I know that tuners seem really basic, but if you ever have to try tuning something like a piano or 12-string guitar, you might consider downloading a dedicated application.
Lingot
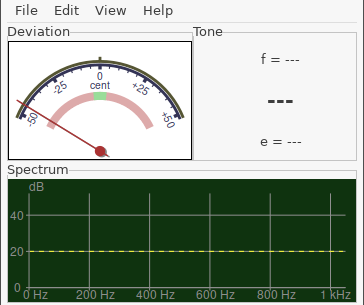
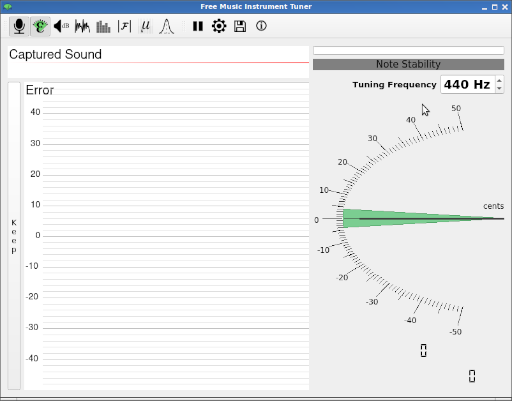
I needed something different when I discovered that my guitar tuner wouldn’t properly identify the range of notes I needed to tune my piano. Two tuners that I tried were FMIT and lingot. I found lingot to be very plug and play oriented. I just had to plug my microphone in, and it immediately recognized it. I got FMIT working, and it seemed more configurable, but I think that I liked lingot better
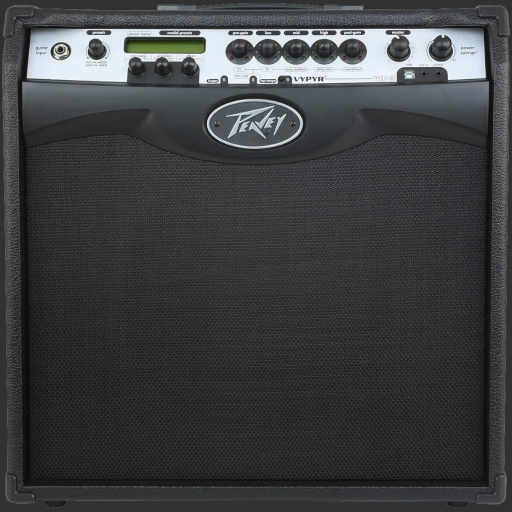
I have owned a Peavy Vypyr III for a couple of years now, and have found it to be a great modeling amp. It came with a CD including a manual and some software to download, but to my immediate dismay, it wouldn’t work with Linux!
The software I am referring to is the Peavy Vypyr Edit software. Going to their website reveals no options for running it on Linux.
Of course I could use the amp as an interface in my DAW, but the ability to change what amp it was modeling or any of the settings was exclusive to manually changing it!!! I have read of people selling their amp because they run Linux. You don’t have to choose between your OS and amp!
I have been increasingly impressed by WINE’s ability to open Windows applications and just work. I did have to mess around with what order I turned the amp on and when I opened the software, but apparently that isn’t specific to running it on Linux. Here is what it looks like in Linux!
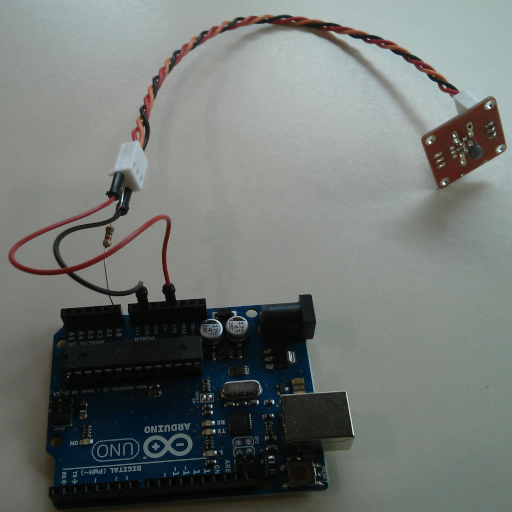
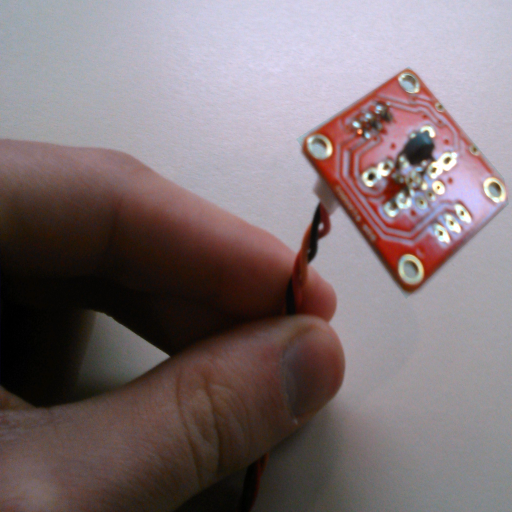
Temperature readings are a very useful data source. From mini weather setups to indoor readings, the thermistor sensor has many possible applications. The Arduino is a great board for gathering sensor data, being so low powered, easy to use, and giving precise controls and readings with its built in crystal oscillator.
This module has a NTC, 100k, disc thermistor. I used a 1k resistor on the output pin coming from the thermsitor.
I borrowed some code from this forum post. You may have to change some values depending on what thermistor, resistor pair you use, but that code should give you a near approximation. For a more in-depth, accurate approach, consider reading this post.
I don’t know about you, but one of my favorite video games, or video game series rather, is The Legend of Zelda. There are different instruments that the main character in the game carries, especially in Links Awakening where there are multiple. To me though, the most prominent is his Ocarina. I mean, there’s a whole game called The Ocarina of Time.
Here is what the fingering chart on the back of the box looks like. The whole box had nice Zelda artwork on it.
Other than my attachment to it because of Zelda, it is really quite comparable to a flute or recorder, but it has a different tonal quality. It doesn’t posses that voice crack sound of the recorder, and doesn’t have the breathy, wind sound of the flute. It really is a unique instrument to be reckoned with.
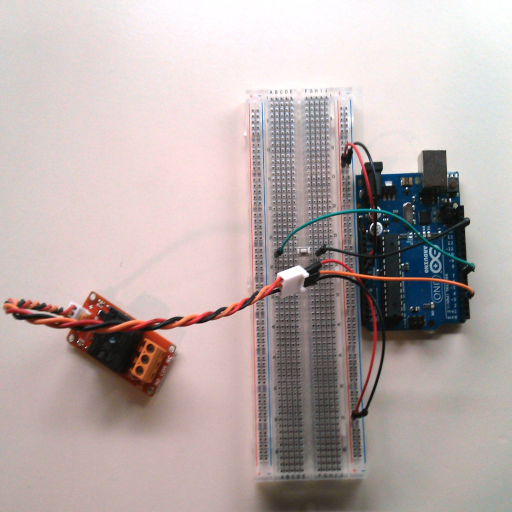
Do you ever get tired of getting up to turn the light off? Is that fan running when it doesn’t always need to be? A relay is a simple switch controlled by a small input signal, and when paired with an Arduino board, it can be told through code to turn on under specified conditions. This gives more control than a manual switch, and more convenience.
I am using an Arduino Uno and a TinkerKit relay module in this example. The red wire coming from the relay is 5v, the black wire is GND, and the center orange wire is the signal input wire to activate the relay. I put a button in to control the relay, and that required more code.
I ran into debouncing problems, and had to do some research. With push buttons, the button could be slightly pressed and send multiple short signals. As you can imagine, your lights flickering on and off like that would be an annoyance, and it would be hard to stop the flickering in the desired position, on or off. After reading, I found that some had suggested a 10ms delay in the loop would solve that problem. Here is the code I used after some edits.
const int BUTTON_PIN = 7; // set button pin
const int RELAY_PIN  = 3; // set relay pin

int button_state = 0; //variable for button's state
int button_state_old = 0; //variable to store old button state
int relay_state = 0; //variable to store relay state


void setup() {
  Serial.begin(9600);
  pinMode(BUTTON_PIN, INPUT_PULLUP); // set arduino pin to input pull-up mode
  pinMode(RELAY_PIN, OUTPUT);        // set arduino pin to output mode
}

void loop() {
  button_state = digitalRead(BUTTON_PIN); //read button input value and store

  if ((button_state == HIGH) && (button_state_old == LOW)) {
    relay_state = 1 - relay_state;
    delay(10); //10ms delay
  }

  button_state_old = button_state; //set old button state

    if (relay_state == 1) {
    digitalWrite(RELAY_PIN, LOW); //switch relay on
  } else {
    digitalWrite(RELAY_PIN, HIGH); //switch relay off
  }
}