I think most of us have at one point or another yelled in a large building or tunnel and heard our voice echo. This effect will add that kind of sound to your music, and if timed properly, it can greatly enhance the overall feel.
Here is a little demonstration of the echo effect. This is a little beat I made with a boring chord section.
Demo No Echo
So, the chord section is too basic. Now, I could go and repeat the notes, or change their velocity, but I just added the Guitarix echo plugin.
Demo With Echo
As you can tell, that echo really adds to the chord section. The Guitarix plugin had two inputs. One was the release time which changes how long it will repeat for. The other input was the time which just changes how fast or how slow it echos. With just a little playing around you can get your instruments echoing in no time.
Another key effect that is used in many different types of music is chorus. Chorus takes the main signal and changes the pitch up or down to create a fuller, shimmery sound, kind of like playing a single note versus a whole chord. You could create multiple tracks with different pitches, but chorus effects are built to properly mix the sounds so nothing sounds off key.
Chances are that any of those shimmery guitar songs you have heard had some chorus in there. This effect tied with some reverb and a flanger produces that classic guitar vibe.
Here are two little bits of guitar I recorded. I added plate reverb to both, but the first has no chorus. Try to see if you can tell the difference.
Guitar Snippet With No Chorus
Here is the same track with reverb, only some chorus was added to make it complete.
Reverb is undoubtedly one of the key basic plugins for music production, but there are some key things to know about it before you go slapping it on every track. There are multiple types of reverb plugins that emulate different types of rooms or represent different ways to artificially add reverb to a track.
Here is a little guitar snippet that I recorded so we can see the differences in each reverb type. This signal was passed through the same effect pedal but the reverb level was set to 0% meaning there was no reverb added.
Guitar Snippet Dry
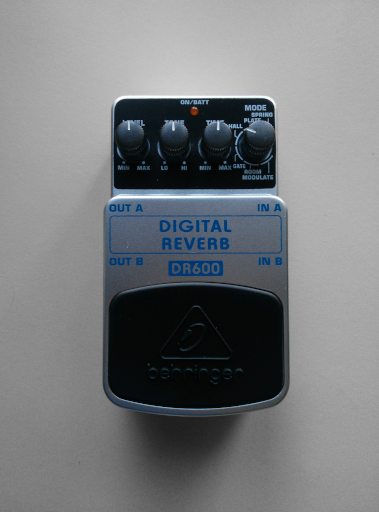
Here is the Behringer digital reverb pedal that I used to get all these different reverb samples. Of course there are VST, AU, and LADSPA reverb plugins, but this was an easy all in one for me.
The first one I’ll talk about it hall reverb. As the name suggests, it is meant to emulate the sound of a concert hall or theater. Hall reverb often makes the sound go on for a lot longer (long decay time). Hall reverb is often added to strings or pads to add a higher level of richness to them.
This is what that guitar snippet sounds like with a hall reverb at 50% reverb level. (All the rest of the reverb samples have the same reverb level.)
Guitar Snippet w/ Hall Reverb
The second key type is a spring reverb. This reverb isn’t meant to emulate a real life place, but it is artificial by design. Spring reverb is often used in guitar amplifiers, making it great for, you guessed it, guitars. This one is characterized by a warm, richness.
This is what that guitar snippet sounds like with a spring reverb.
Guitar Snippet w/ Spring Reverb
Another artificial reverb type is a plate reverb. The sounds produced are often bright and clean. This can help cut through the mix more than some of the other types of reverb making it good for vocals and some drum tracks.
This is what that guitar snippet sounds like with a plate reverb.
Guitar Snippet w/ Plate Reverb
And last but certainly not least is the room reverb. This type tries to emulate the sound of a smaller room, such as a studio, and produces a more realistic sounding reverb effect. This reverb is great for any track, and is really useful for more up close in your face sounds.
This is what that guitar snippet sounds like with a room reverb.
Guitar Snippet w/ Room Reverb
Have fun experimenting with different types of reverb on your tracks, and don’t feel confined to only using one type of reverb on certain tracks. The key thing to remember with reverb is not to over do it.
Just the other day I was working on a project, and decided to fire up the old dremel. It turned out that my plans were about to change, as I accidentally broke it. Yes! I broke a tool. It turned on just fine but the switch got stuck in between the on and off setting.
It started revving up and down as I tried to get it all the way on or back off, but the button wouldn’t budge! Smoke started to pour out the ventilation grate, and I speedily unplugged it from the wall. So, what next, it’s broken right?
Well, after waiting couple hours for any potentially dangerous capacitors to discharge, I set out on a repair mission. When I opened it up, the culprit was immediately identifiable.
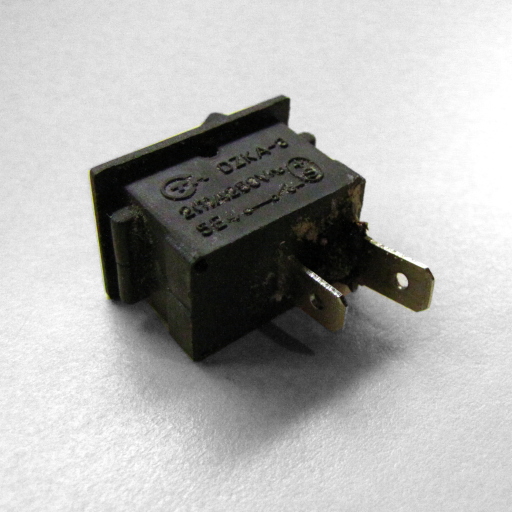
Here is the button that I removed from the dremel. Notice anything wrong? The bottom was all burnt, and it smelled horrible too. In case you’re wondering, yes, it’s still stuck.
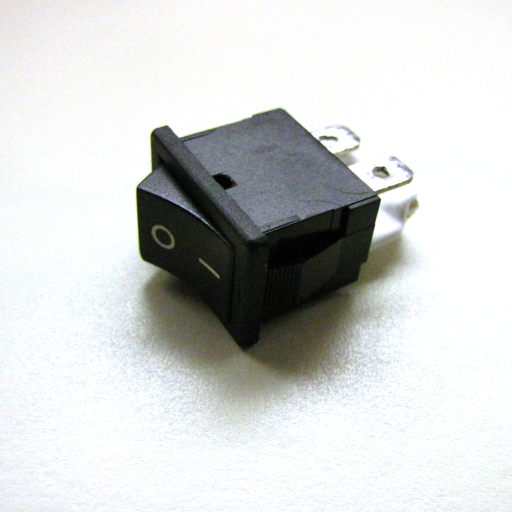
Lucky for me, my dad has a stash of old electronics in the closet, and as it turned out there was a near identical button in there. Here is what it looks like after some de-soldering and cleaning.
Yes, I know it is a DPST (double pole) switch, but when I say identical, I really meant it has the same voltage, amperage ratings, and it fits. As you can see in the picture, I just covered up one sides terminals with heat shrink to ensure insulation.
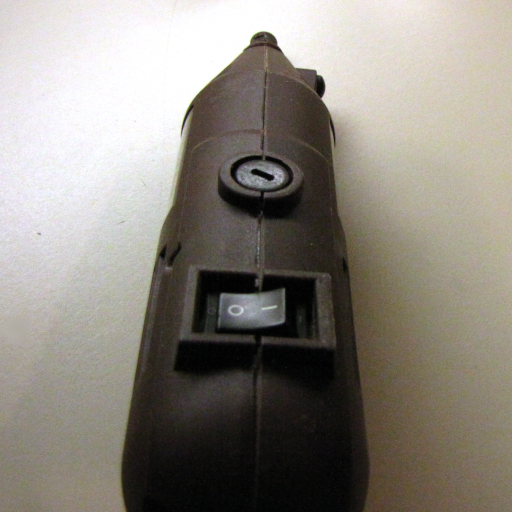
Here is what the insides of the dremel looked like when disassembled.
The button is just connected with those two female electrical sleeves, and the wheel down there is the potentiometer for speed settings.
Nothing else looked burnt, so I wired it all up and gave it a go (ready to unplug it from the wall at any indication of smoke).
It worked just like before, and after a minute of running at full speed, there are no apparent problems. I’m sure glad to have this tool back working again!
I have been tweaking my Arduino project lately and have got some decent results. I started by setting up the relay and thermistor separately. The plan was to turn on and off a fan based on when the room was hot or cold. Of course the hot and cold values were just our preference as set in the Arduino’s code.
Here is what the current prototype looks like.
Graphing the serial output was something that helped us choose what temperature to turn on and off at. It currently sits near the heater and helps to circulate the warm air.