Recording in Ardour

Having the ability to record and synthesize side by side is the reason that I have started to really use Ardour. I used my Behringer U-Phoria UMC-22 and my Samson CO1 Condenser microphone. It is really budget equipment, but it serves my purposes well. The nice thing is the Behringer DAC automatically came up as an option on Ardour as an audio interface. I know that on Windows, you sometimes have to install drivers to get the interface to come up, but on Linux it worked great for me.

Setting Up DAC

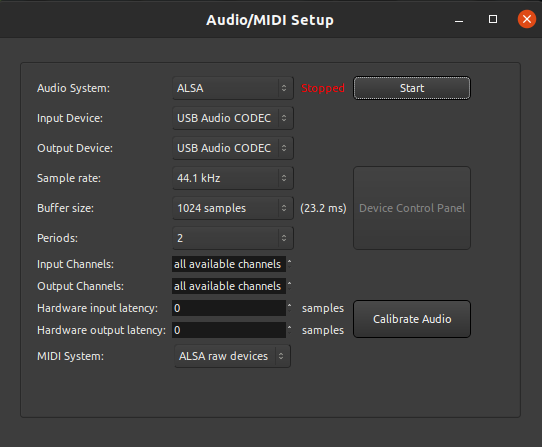
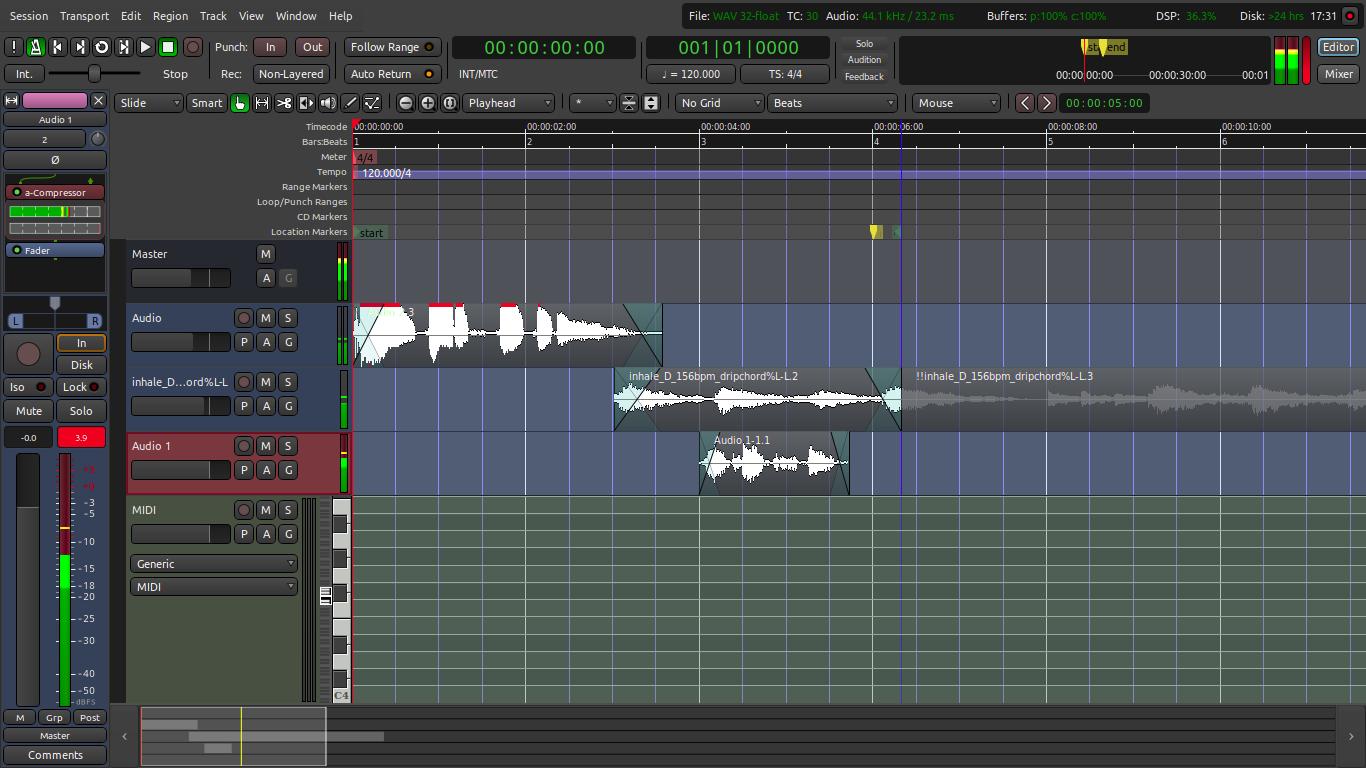
As you can see, I switched my Input Device and Output Device from my laptop’s sound card to my DAC. To be sure that your microphone is coming through, you should see audio coming into the track on the input volume level bar (the green bar in the picture below). Once you have a microphone hooked up, then it is on to recording. All you have to do is add a normal audio track. There is a button to prime each individual track for recording, so be sure to click it on the proper track. You can then press Shift and Space bar to start recording. Instead of that shortcut you could also press the record button at the top of the program and then play.

Recording Track

Ardour Sub-Mix

Before I explain how to add and setup a sub mixing bus in Ardour, I must explain how it’s useful. My particular usage was to control the volume of multiple drum tracks. The bus basically allows you to affect or mix multiple tracks instead of doing them all individually. Another use case would be to add audio effects to multiple tracks, like reverb.

So, to add an audio bus in Ardour you add a audio bus track just as you add other tracks. Something to notice is that it automatically has the track set to mono, but I changed it.

Adding A Audio Bus

Here is what it looked like on my mixer window. As you can see I had four different drum tracks that I was trying to mix together. On the end there is the audio bus that I added.

Mixer Window

If you click on Window -> Tracks and Busses you can bring up the routing grid for all the tracks and busses. All you have to do to connect the tracks to the bus is disconnect them from the Master in, and reconnect them to the name of your Bus in. You also have to connect the bus to the Master in so it actually outputs audio. Below you can see my tom drum connected to the bus, and I just did that for the rest of my tracks.

Tracks and Busses Window

LV2 Plugins

There are multiple different types of audio plugins that you can use. LV2 plugins work exceptionally well on Linux and there is a large selection of free ones. The LV2 MIDI instrument I used was Dexed. Anyways, you just download the file and copy the .lv2 file to /usr/lib/lv2, at least on Linux. Obviously, you would put it elsewhere on different OSes. On opening Ardour it should be in your options for adding a MIDI instrument track.

Adding MIDI Instrument

So now you can expand the track to get a keyboard.

Expanded Track

I have used LV2 plugins on other software before and I was trying to find out how to customize the instrument. By opening the mixer window you should be able to see all the tracks.

Dexed

If you double click the name, in this case the red “Dexed”, it should open up a dashboard for the plugin where you can customize the sound. Also, you can press the keyboard symbol in the corner to allow the keyboard to act as the piano keys. This helps greatly when trying to get the perfect sound.

Instrument Dashboard

Ardour

I used Ardour for the first time the other day. Really, I have downloaded it before, but upon opening it I came to the resolution that it was to complicated as I couldn’t get any audio to be produced. It has been a year or so now, and I have come to want the use of a fully functional DAW. After some research I found out how to do basic audio routing and got sound to be produced! It turns out it isn’t really that hard. Last time I was grappling with using JACK and Ardour together, which would make it have lower latency, but it adds to a beginners confusion.

First Time Using Ardour

I only spent a few minutes, as you can probably tell with the audio clipping. Anyways, my main reason for wanting to use Ardour is the recording ability. I was previously using LMMS which is great for making synth tracks, but live music incorporation was just to much work. I was also using Audacity, but it didn’t seem to have easy incorporation of MIDI instruments. I will go over them in later posts as they are still very good applications.

After just a little bit of playing around I was able to get MIDI instruments working. I downloaded the Black Pearl Drum-kit, and was able to get it working easily.

MIDI Drums In Ardour

Lego Card Shuffler

Now that it is summer I have a lot of time on my hands. I started looking into the logistics of building a Lego card shuffler. There are many YouTube videos of Lego card shufflers. They are all quite similar in their construction except the robotic card dealer.

Lego Shuffler

I started to build a single roller for one side. Most of the videos I watched said that the hardest thing was to ensure one card came out at a time, and it was. I used rubber bands to force the cards into the rollers, but for future innovation such as multiple unaided shuffles that will have to change. I wanted to limit the whole thing to one motor. It would have been much easier with a motor on each side, but I have limited resources.

The card bed and rollers

To use one motor, I had to connect both sides together. I tried to use gears, but it was to far a distance to cover with plastic gears and they started to skip. I ended up using a piston like those used on trains to transfer the motors power. I got the idea from this video.

“Real” card shufflers don’t require you to take the cards out. This is the most obvious way to improve this design. To further improve, there would also have to be some minor programming for timing. I think that the hardest part would be splitting the deck. Using a lowering and raising deck like automatic card shufflers do seems like the easiest way to solve this.

Another thing about this design it that it doesn’t shuffle the cards super accurately. I put the cards in, half upside down, half face up.

The card shuffler in action

The cards came out like this. They tend to get stuck together because they come out and stack vertically.

The shuffler accuracy
The cards stacking improperly